Tuesday, November 15, 2011

Hyper-V Free Hypervisor Hardware Virtualization (KB950050) Download for Windows Server 2008

Microsoft Hyper-V (codename Viridian) is a hypervisor based server virtualization or hardware virtualization software for x64 (64-bit) versions of Windows Server 2008. Formerly known as Windows Server Virtualization, Hyper-V is also available in standalone low-footprint version, Hyper-V Server without Windows Server components which costs as less as $28.

One may asks what’s the differences between Hyper-V with Virtual Server and Virtual PC, both also offered for free by Microsoft. The current Virtual Server 2005 R2 and Virtual PC 2007 SP1 is based on hosted virtualization platform, also known as Type 2 hypervisor that runs within an operating system, and thereby “guest” operating system in the virtual machine runs at the third level above the hardware. Hyper-V meanwhile is Type 1 native hypervisor that runs directly on a given hardware platform (as an operating system control program), and “guest” operating system thus runs at the second level above the hardware, allowing users to consolidate a vast array of workloads and move toward a dynamic IT environment.
A preview beta version of Hyper-V is shipped with x64 editions of Windows Server 2008. And now the RTM version of Hyper-V has been released by Microsoft. Hyper-V features new 64-bit micro-kernelized hypervisor architecture, supports 32-bit and 64-bit systems across different server platforms, such as Windows, Linux, and others, supports Symmetric Multiprocessors (SMP), includes new virtual switch capabilities to run with Windows Network Load Balancing (NLB) Service, comes with the new virtual service provider/virtual service client (VSP/VSC) architecture, and has ability to take snapshots of a running virtual machine to easily revert to a previous state.
The RTM update to the Hyper-V comes with KB950050 Update for Windows Server 2008. The KB 950050 update provides improvements to security, stability, performance, user experience, forward compatibility of configurations, and the programming model. Although Hyper-V is only available for x64 system, but the KB950050 with minimal components also applies to x86 (32-bit) Windows Server 2008 system.
The 32-bit Update for Windows Server 2008 (KB950050) package includes the release version of the following:
  • The Hyper-V Manager console
  • The Virtual Machine Connection tool for x86-based editions of Windows Server 2008
This 64-bit Update for Windows Server 2008 x64 Edition (KB950050) package includes the release version of the following:
  • Hyper-V technology
  • The Hyper-V Manager console
  • The Virtual Machine Connection tool for x64-based editions of Windows Server 2008
  • Integration Services for the following operating systems: Windows Server 2008 (x86-based and x64-based editions), Windows Server 2003 Service Pack 2 (SP2) (x86-based and x64-based editions), Windows 2000 Server Service Pack 4 (SP4), Windows Vista Service Pack 1 (SP1) (x86-based and x64-based editions), Windows XP Service Pack 3 (SP3) (x86-based editions), and Windows XP Service Pack 2 (SP2) (x86-based and x64-based editions)
The KB950050 RTM update for Hyper-V will be rolling out and delivered via Windows Update from July 8, 2008. For system administrators who want to update their system now, download update package setup installer from Microsoft Download Center.
Hyper-V Update for Windows Server 2008 (KB950050) 32-bit Edition
Hyper-V Update for Windows Server 2008 (KB950050) 64-bit Edition
Download KB977206 to Run Windows Virtual PC (XP Mode or VM) With No Hardware Virtualization

One of the original system requirement (part of Windows 7 system requirements) for Windows Virtual PC (and hence Windows XP Mode) is that CPU must support hardware-assisted virtualization (HAV) and has the feature turned on or enabled in BIOS. The Windows Virtual PC (VPC) designed specifically for Windows 7, take advantage of HAV support on processor to improve the performance of virtualization technology (VT) when the virtual machines are powered on.

Some computer system with low-end or mid-range Intel and AMD CPU processor which does not support hardware-assisted virtualization (such as Intel VT-x, VT-d or AMD-V). Even if HAV is supported, some PC manufacturers and vendors have the function disabled, turned off and locked in BIOS level (Tip: How to check and verify hardware virtualization support on processor). As the result, user cannot start, configure or run any virtual machine including Windows XP Mode in Windows Virtual PC. One of the following error messages will be displayed instead:
Unable to start Windows Virtual PC because hardware-assisted virtualization is disabled
This error message indicates that the hardware-assisted virtualization (HAV) feature is not enabled on the computer.
Cannot start Windows Virtual PC Host Process. Check the System event log for more details
This error message indicates that the processor does not support the HAV feature.
Windows Virtual PC cannot start because this computer does not support hardware-assisted virtualization
This error message is displayed when user tries to start or configure a virtual machine that is not running Windows XP Mode. This error message indicates that the processor does not support the HAV feature.
To make virtualization more accessible to many more PCs for small and midsize businesses wanting to migrate to Windows 7 Professional, Ultimate and Enterprise, while still running Windows XP-based productivity applications, Microsoft decides to remove the hardware virtualization technology prerequisite requirement in order to run Windows Virtual PC. It means that any PC with Windows 7, and with the hack for Windows 7 Home Premium, Home Basic and Starter to install Windows Virtual PC and Windows XP Mode), everybody can install and run Windows Virtual PC to power up any (virtual machine) on any computer and system.
To enable Windows Virtual PC and Windows XP Mode on computer without hardware virtualization support, Microsoft releases KB977206 Update for Windows 7, which removes the prerequisites required to run Windows Virtual PC and XP mode. The prerequisites include a processor which supports hardware assisted virtualization (HAV) which is also enabled in the BIOS.
Note that if your current system already installed with and can run Windows Virtual PC and Windows XP Mode, the update is not required and not necessary. Windows Virtual PC will still take advantage of hardware virtualization support if it’s available. In fact, Microsoft says that while customers can start using Windows Virtual PC to run Windows XP Mode or create virtual machine running Windows Vista or Windows 7 without having to worry about hardware virtualization, HAV is still recommended for later case as the non-HAV is only supported and tuned for XP Mode.
Download KB977206 Update from Microsoft Download Center (32-bit or 64-bit). Windows Genuine Advantage validation is required, or else just download the setup installer for KB977206 from the direct download links below.
32-bit (x86): Windows6.1-KB977206-x86.msu
64-bit (x64): Windows6.1-KB977206-x64.msu
After installation, user may have to restart your computer.
There is no change to the code bits of Windows Virtual PC and Windows XP Mode. Check out the official direct download links for Windows Virtual PC and Windows XP Mode.

Monday, November 14, 2011

Hardware-Assisted Virtualization (HAV) Detection Tool Free Download

More and more virtualization product or solution such as VMWare Workstation and Windows Virtual PC now requires Hardware Assisted Virtualization (HAV) CPU feature in order to function properly as allows a virtual machine hypervisor to run an unmodified operating system without incurring significant emulation performance penalties. The largest chip makers, Intel and AMD implement hardware assisted virtualization in their processors as Intel VT (VT-x) and AMD-V respectively. However, not all modern CPU has hardware-assisted virtualization capability built-in though.

For user who want to verify, check, determine or get to know whether his or her PC computer supports hardware-assisted virtualization, there is a software utility named SecurAble which able to display hardware virtualization support status as Yes, No, Locked On and Locked Off.
Microsoft has also released a application tool that able to detect status of Hardware-Assisted Virtualization (HAV) support on the computer system’s CPU microprocessor. Aptly named as Hardware-Assisted Virtualization Detection Tool or simply as HAV Detection Tool, the utility can detect and check if the computer meets the processor requirements to run Windows Virtual PC, i.e. hardware-assisted virtualization.

Download HAV Detection Tool: havdetectiontool.exe
Using HAV Detection Tool is easy, just run the executable, and the results of whether hardware virtualization support is existed on the system or not (together with ability to install Windows Virtual PC) will be displayed on result dialog. It’s standalone program, thus no installation or uninstallation required.

How to Access Windows Virtual PC BIOS Setup Utility

The virtual machine created by Windows Virtual PC, the new version of virtualization software from Microsoft for Windows 7, may be simulated and run in within Windows itself, but that doesn’t mean it lacks features that an actual physical computer have. One such low level component of PC is BIOS (Basic Input/Output System), which does exist in virtual machine too. Much of the modern common BIOS settings can be viewed or changed in VM’s BIOS too, such as system time, system date, IDE configuration, Num-Lock on boot, power management (APM), ACPI, boot devices sequence, and supervisor/user password.

Windows Virtual PC is equipped with AMIBIOS. In fact, the predecessor Microsoft Virtual PC (VPC)‘s BIOS has been modified by hackers in order to perform OEM activation crack. However, in Windows Virtual PC, the access to BIOS Setup Utility has been somewhat skipped and bypassed, due to the new enhanced integration features, which provides devices and resources sharing between host and guest operating system, specifically advanced features such as auto logon to guest Windows OS, and auto publishing installed application shorts to host Windows 7 Start menu.

Thus, in order to access and go into Windows Virtual PC (WVP)’s virtual machine’s BIOS configuration screen, the trick is to disable and turn off the Integration Features temporarily. To do so, start the virtual machine which you want to access its BIOS. Click on Tools in the menu bar, and click on Disable Integration Features. Then, go to Action pull down menu and select Restart to reboot the virtual machine.
On initial boot up, the virtual machine will perform POST (power-on self-test) sequence with black background screen like most PC computer. At this point, press Del key in order to access BIOS Setup Utility user interface of the virtual machine.

Tip: The POST sequence passes pretty quickly, so do press Del key quickly on boot up. After accessing the BIOS, just click on “Enable Integration Features” on “Tools” pull down menu to re-enable the integration features.

Access Your Computer Anywhere with icloud

Do you intend to have your own virtual desktop which allows you access from anywhere and anytime as long you have internet access? If yes, icloud could be a good solution for you. The icloud desktop is designed to have the same look and feel as traditional windows desktop application but one of major differences is it is running online in the cloud. It is based on today’s advance internet technology in order to meet the growing population of internet users and can be accessed via web browser or mobile PDA as long as they are connected to internet.


The main driver to have icloud technology is due to limitation of today’s conventional operating systems such as Windows, Mac OS or Linux. Some of the actual scenarios include virus intrusion on actual computer due to software download or installation, additional cost to purchase software, forget to copy important documents in USB device and bring along with you for meeting, can’t view each others’ calendar in Outlook and many more. icloud consist of a desktop with applications and files that are stored in the cloud. Since it is running in the cloud, it can offer you some very impressive features such as easy sharing and real time collaboration, built-in marketplace with availability of free applications and many more.
You probably wonder what is the internet OS used in icloud service. The OS used is an open source Xcerion XML Internet OS/3 (XIOS/3). It has been developed since 2001 by Xcerion and was launched as a beta service on 30th September 2007. XIOS/3 is well known and widely being used in worldwide application developer community. This means that you will have more and more free applications ranging from games, entertainment, personal finance tool, productivity tool and etc being offered in icloud service in short future. If you have programming background, another great thing is you can even modify the application by using the software modification in order to suite to your personal preference. XIOS/3 enables web browsers to run icloud applications without the need to install any plug-ins like Flash or JRE.
If you would like to get yourself the experience of using icloud desktop, try it today. Go to http://icloud.com/ to register an account. The activation link will be sent to your email after few hours of the registration. Click on the link to activate the account followed by creating your preference username and password then just login to icloud by using the username and password you have just created.

How to Enable Automatic Download Sync iCloud with iOS and iTunes

While the full suite of iCloud services are going to be released coming Fall, where full experience can only be enjoyed with iOS 5 and iTunes 10.5, a feature nonetheless has gone live immediately. The feature is iTunes in the Cloud. You can call it buy one, download and sync to anywhere function, which lets users sync and download the iTunes purchases of music, apps and books wirelessly between the cloud (Internet) with iPhone, iPad, iPod touch, and iTunes on Windows PC or Mac OS X machine.

In order to iOS devices and iTunes to download the purchased music, apps and books automatically and appear instantly on your all other iOS devices, you may need to configure iTunes and iTunes Store app on the mobile devices to enable the automatic download so that you need not to manually check for available downloads.
Note: Sign in to the iTunes Store with Apple ID. You need to use same single Apple ID for all your iOS devices and computer for automatic downloads to work. Automatic downloads do not support multiple account, including people who buys from US iTunes Store and foreign iTunes Store.
How to Enable Automatic Downloads in iTunes (Requires iTunes 10.3 or newer)
In iTunes menu bar, go to Edit (for Windows) or iTunes (for Mac OS X) -> Preferences, and then click on Store tab. A new section called “Automatic Downloads” is available. Select and check the type of content (Music, Apps and Books) that you want iTunes to automatically download right after purchases are made.

Another new option is “Automatically download pre-orders when available” which is now meant for content purchased via iTunes Pass and other pre-orders. You can enable it if you want pre-orders to be available automatically on the device.
How to Enable Automatic Downloads on iOS Devices
iDevices preloaded with iOS 5 will probably have automatic downloads enabled by default. But existing iOS devices of iPhone, iPod touch and iPad running on iOS 4.3.3 may not have automatic downloads features turned on yet, despite the function is now supported, via over-the-air (OTA) update pushed by Apple to iDevices running iOS 4.3.3.
Here’s how to enable Automatic Downloads on mobile devices running iOS 4.3.3 or newer:
  1. Tap Settings -> Store on iOS device.
  2. Optional: Tap Sign In if you’re not already signed in to the iTunes Store, and login with the single Apple ID and password.
  3. Tap the On/Off switch to On for content (Music, Apps and Books) that you want the device to automatically download after purchase from another device.
  4. Another option available is Cellular. Switch on if you want to enable Automatic Downloads over cellular network on an iPhone or iPad Wi-Fi + 3G. Only content less than 20MB will be downloaded even over mobile data network.
Note: Install iBooks from the App Store to enable Automatic Downloads for Books.
Automatic Downloads is only applicable the new purchases that been made on iTunes Store after it’s enabled, but you can always download previous iTunes purchases to any iOS devices or computers.

iCloud Lives

The official Apple iCloud website has been put online ahead of the release of iOS 5 which will be available for download in a few hours time. iCloud has been one of the core service that included in iOS 5, where its primary function is to automatically, effortlessly and seamlessly stores all your music, photos, documents, and more and wirelessly pushes them to all your devices.

Login to iCloud via https://www.icloud.com/.


However, you can sign up for iCloud service on the website. Instead, uses are required to sign up for an iCloud account on an iPhone, iPad, or iPod touch running iOS 5, or on a Mac running OS X Lion v10.7.2, in order to start using free service of Mail, Contacts, Calendar and iWork. Find My iPhone, iPad, iPod touch, or Mac service is already live as it’s been available for free previously.

iCloud includes:
  • iTunes in the Cloud: Music you purchase in iTunes appears automatically on your devices. You can also download your past music or TV show purchases. Note: iTunes in the Cloud availability varies by country. TV shows is U.S. only.
  • Photo Stream: When you take a photo on one iOS device, it automatically appears on your other devices with no syncing required.
  • Documents in the Cloud: If you’ve installed an app that supports Documents in the Cloud on more than one device, iCloud automatically keeps your documents up to date across your devices.
  • Apps and Books: Apps and books that you purchase appear on your iOS devices automatically. You can also download your past purchases of apps and books.
  • Backup: iCloud automatically backs up your iOS device daily over Wi-Fi when it’s connected to a power source and the device is screen-locked. iCloud backs up your purchased music and TV shows, apps, books, Camera Roll, device settings, app data, Home screen and app organization, messages (iMessage, SMS, and MMS), and ringtones. Note: Backup of purchased music is not available in all countries. Backup of purchased TV shows is U.S. only.
  • Contacts, Calendar, Mail: iCloud stores your calendars and contacts and automatically keeps them up to date across your devices. With iCloud, you can also get a me.com email account that pushes new messages to your devices. iCloud also stores and updates your bookmarks, reminders, and notes.
  • Find My iPhone, iPad, iPod touch, or Mac: If you misplace your iPhone, iPad, iPod touch, or Mac, you can use Find My iPhone to help you find its location on a map, play a sound at full volume, send a message, lock the screen, or erase its data. You can use the Find My iPhone web application at icloud.com on any computer, or download and use the free app on your iOS device.
  • Back to My Mac: Using Back to My Mac, you can securely connect to your remote Mac from another Mac over the Internet, and access files or control its screen.

iOS 5 and iCloud New Features List

Apple officially unveiled the next version of iOS mobile operating system, iOS 5, during the keynote address of WWDC 2011. Unfortunately, iOS 5 is introduced without the much-awaited iPhone 5 (or iPhone 4S). Nonetheless, iOS 5 is probably a do or die firmware software upgrade for iPhone, iPad and iPod touch, which face increased competition from Android phone and tablets, and the upcoming Windows 8.


Apple announces that there are more than over 200 new features and 1,000 new APIs been included and added in version 5 to the iOS, the most advanced mobile operating system, though iOS 5 will probably remembered as a watershed version that Apple tries to catch up (read: copying) instead of innovate ahead of rival platforms, where most of the new features are either already built into Android, Blackberry and/or Windows Phone, or already provided by third-party apps.

Highlights of New Features in iOS 5:
  1. Notification Center – Android style notification bar is finally coming to iOS platform with the introduction of an unobtrusive way to easily view and manage notifications of text messages, missed calls, calendar alerts, app alerts and all other notifications in one place without interruption. Notification Center can be accessed from anywhere within iOS 5, by swiping from top down. New notification arrived will appear briefly at the top of the screen without interrupting current app’s operation, and user can choose to tap on the alert to go to the notifying app, or “X” to close the notification instantly. Currently, a notification pop-up alert is displayed on the center of screen, which stops the current app briefly until user tap on Close button, or View to go to the notifying app.
  2. Lock Screen Enhancement on Notifications – Notifications now appear on the lock screen instead of pop-up alerts which disappear once screen is unlocked. Swiping across the notification (similar to unlock screen but on the line of notification) will take user to the notifying app directly.
  3. iMessage – A new messaging service (but not so new as it’s built right into Messages app which means Messages is now iMessage) that lets user easily send text messages, photos, videos and contact information between all iOS devices – iPhone, iPad and iPod touch. Messages are sent via Wi-Fi or 3G, and can be sent to single individual or a group. All iMessages are automatically pushed and synced to all your iOS 5 devices. iMessage also features delivery and read receipts, typing indication and secure end-to-end encryption. WhatsApp probably has to go permanently free with iOS 5 release. Luckily iMessage only supports inter-IOS messaging. But we keep wondering why Apple even need to spend time to develop iMessage, as there are plenty of apps under Social Networking category that already provide such messaging capability, with most is cross-platform between iOS, Android, Blackberry and even Windows Phone or Symbian.
  4. Newsstand – a new way to purchase and organize your newspaper and magazine subscriptions in bookshelf style.
  5. PC Free – Means no connection to iTunes is required to activate and set up iOS device, and iOS software updates are delivered and installed over the air (OTA). It’s interesting to Apple calls the feature “PC Free” instead of “iTunes Free” or “Cable Free”, as currently iTunes on PC or Mac is required, and not PC is required. Goes PC Free may also start the decline of iTunes, in favor of iCloud.
  6. OTA Delta Updates – Only differences or changes are been pushed over the air to iOS device, instead of whole update package.
  7. Wi-Fi Sync – If you can leave iTunes, Wi-Fi Sync in iOS 5 transfers and backs up the content securely over SSL between iOS devices and iTunes. Any new purchased content is wirelessly synced from device to your iTunes library too.
  8. Twitter Integration – Single sign-on with Twitter and iOS 5 supports tweeting directly from Twitter-enabled apps, including Photos, Camera, Safari, YouTube and Maps. User can also sync contacts with Twitter. Third-party apps can take advantage of Twitter integration with availability of new APIs which allow access to Twitter single sign-on information. Unfortunately, there is no Facebook integration, yet – we hope, which proved to be much more popular than Twitter among novice Internet users.
  9. Safari Reader in Safari – Finally Apple is tackling one aspect of Safari web browser that renders it virtually usable especially on iPhone and iPod touch, that it’s extremely weak in resizing font on web pages to a readable size in single vertical scroll column. Android’s browser has been excelling in this aspect. Safari Reader is an attempt by Apple to catch up with Android, though Apple markets it nicely as a way to “gets all the clutter out of the way and sets the right font size on a web page, so you can easily scroll and read through a story”.
  10. Reading List in Safari – Unlike bookmarks, Reading List saves articles to read later and the list is automatically show up on all your iOS devices.
  11. Tabbed Browsing in Safari.
  12. Reminders app – A tasks management app that lets user create and group tasks together. Features ability to set time or location-based reminder alerts, priorities and due dates, or when you arrive or depart a given location. Tasks in Reminders can be synced and updated to iCal and Outlook.
  13. Instant launch of Camera app from lock screen by double pressing the Home button, and tap on Camera icon beside the unlock bar.
  14. Snap button to capture photo – Long overdue feature which uses the volume-up button to quickly snap a photo instead of tapping on snap button on screen.
  15. Enhancement to Camera app – Optional grid lines to help line up objects, and a tap will lock focus and exposure settings on one subject, useful when capturing creative scenes that require focus on object which is not a main subject.
  16. Enhancement to Photos app – Ability to auto enhance, crop, rotate, enhance and remove red-eye, and organize your photos into albums right on the device to share them on the go.
  17. Split Keyboard – System-wide split keyboard mainly for use on iPad by dragging keyboard with thumb at the top of iPad.
  18. Dictionary – iOS 5 will come with a built-in dictionary which can be utilized by all the App Store apps.
  19. Game Center enhancement – Features ability to add photos to your profile, purchase new games from within the Game Center app and easier ways to find friends and new games via automatic recommendations.
  20. Mail enhancements – Include another long overdue ability to compose messages using draggable address field to rearrange name, and a new formatting bar with bold, italics, underline and indention controls, aka HTML rich text formatted email messages. Also supported is ability to add or delete mail folders from within the Mail app.
  21. Calendar enhancements – Year view on iPad and week view on iPhone and iPod touch, with ability to view event attachments from within the Calendar app.
  22. New multitasking gestures for iPad, e.g. using four or five fingers, swipe up to reveal the multitasking bar, pinch to return to the Home screen, and swipe left or right to switch between apps.
  23. AirPlay Mirroring – wirelessly display iPad 2 screen to HDTV screen through Apple TV.
  24. iCloud – The strength of Apple marketing is probably to pack several features into one and keep saying it’s a breakthrough innovation, and the believers accept it without doubt. But kudo to Apple, their approach may be more elegant and easier to use. iCould is a cloud-service seamlessly integrate with your apps to automatically and wirelessly sync and keep all of your mail, contacts, calendars, photos, apps, books, music and more, up-to-date across all iOS devices without ever having to connect to a computer. It inherits all features of the failed Apple MobileMe service, put iTunes Store on the cloud, and has music store that competes with Google Music and Amazon Cloud Player. Here’s breakdown of various iCloud features and offerings:

    1. Completely free former MobileMe services – Contacts, Calendar and Mail synchronization across all iOS devices and with computers with iCal and Outlook through iTunes 10.3 or newer version. With iCloud, users can share calendars with friends and family, and the ad-free push Mail account is hosted at me.com. No surprise here as PIM synchronization is a must since very early existence of smartphone since Palm and Pocket PC era.
    2. App Store and iBookstore allows download of purchased iOS apps and books to up to 10 iDevices at no additional cost. Download is easily accessible after logging in with Apple ID as purchase history is shown with iCloud icon to start the download.
    3. iCloud Backup – A feature naturally must available as iTunes is no longer compulsory. iCloud Backiup automatically and securely backs up content on iOS devices to iCloud daily over Wi-Fi when you charge your iPhone, iPad or iPod touch. Backed up content includes purchased music, apps and books, Camera Roll (photos and videos), device settings and app data. The backed up data can be restored to new iOS device by just entering the Apple ID and password during setup. The function is currently performed by iTunes.
    4. iCloud Storage – Offers up to 5GB of free storage to seamlessly store all documents created using iCloud Storage APIs, including Pages, Numbers and Keynote (iWork), and push/sync to user’s all iOS devices. The space is also been used to store mail and backup. But music, apps and books purchased from Apple does not take up the available free space limit even though they’re also stored online at the cloud. With most iOS devices internal storage starts from 16GB to as high as 64GB, additional storage purchase will probably be yet another service that generates huge income for Apple, especially from people who takes a lot of photos and videos, or get music and movie from non-Apple source. Unlimited iTunes storage costs $24.95/year.
    5. iCloud Photo Stream – Automatically uploads the photos you take or import on any of your devices and wirelessly pushes them to all your devices and computers. Only the last 1,000 photos are stored on mobile devices, and iCloud will store each photos for 30 days for pushing to all connected devices. Photo Stream is built into the photo apps on all iOS devices, iPhoto on Macs, and saved to the Pictures folder on a PC.
    6. iTunes in the Cloud – Allows users to download previously and newly purchased iTunes music to all own iOS devices at no additional cost, manually or automatically. A new “Purchased” tab is included in iTunes for this purpose.
    7. iTunes Match – For $24.99 annually, iCloud will scan and match all music stored on local drives against iTunes’ online database of 18 million songs. If any is matched, the songs are replaced with a 256 kbps AAC DRM-free version stored on iCloud. The songs are instantly available on the iCloud without having to upload the complete local music files, and enjoy all benefits similar to music purchased from iTunes. Only unmatched songs are uploaded. But, do you like to be charged double to enjoy music that you’re already owned? Of course, unless you have thousands of illegally downloaded music wanted to be “converted” into legal versions, hosted on iCloud, which probably will become biggest pirated music hosting service. And unfortunate again, iTunes Match and iTunes in the Cloud is for iOS ecosystem. If you also have Android, Blackberry, Nokia Symbian, Windows Phone 7 or other mobile devices, Catch Media’s Play Anywhere, available through Best Buy Music Cloud is a similar service that even preceded iTunes Match.
    Many online storage service provider such as Dropbox, Box.net and SugarSync has already provided cloud backup and sync service with added advantage of cross-platform support, though it can’t really integrates with native apps of iOS due to closed system nature of iOS.
    Anyway, the good thing of iCloud is bring to an end the costly MobileMe, which priced at $99 yearly subscription. Instead, most of MobileMe original services are now available for free, including Find My iPhone which was made free in 2010. If you have paid up, you can get full refund if your license is used less than 45 days.
A video introduction of iOS 5 from Apple:
More information with screenshots of iOS 5 is available at http://www.apple.com/ios/ios5/.
iOS 5 is available free of charge for iPhone 4, iPhone 3GS, iPod touch 3G, iPod touch 4G, iPad 1, iPad 2 and Apple TV 2G. It will definitely come as factory-installed for new iPhone – named either as iPhone 5 or iPhone 4S. The beta version of iOS 5 and SDK are available for free download for iOS Developer Program members at developer.apple.com, with final version for end-users scheduled to be released by fall 2011.
Update: iCloud and iOS 5 are live.

iPhone 4S Features and Specs (Order and Price Details – inc Unlocked)

The refreshed iPhone 4S have officially been made available for pre-ordering starting since monring of Friday, October 7, 2011, on Apple online stores or mobile service providers’ online stores in several countries, including United States via AT&T, Verizon and Sprint; United Kingdom via O2, T-Mobile, Orange, Three and Vodafone, Australia via Optus, Telstra, Vodafone and Virgin Mobile; Canada via Bell, Fido, Koodo, MTS, Rogers, SaskTel, Telus and Virgin Mobile; Germany via O2, Telekom and Vodafone; and France via Orange, SFR, Bouygues Telecom and Virgin Mobile.


While the features of iPhone 4S is considered by many to be underwhelming with just minor upgrade from iPhone 4, but the smartphone is still a hit among Apple fanboys, especially with projected huge pent-up demand due to a longer than usual gap of 16 months between release, and is expected to be selling like hotcakes.
iPhone 4S features:
  • Dual-core A5 chip (upgraded from single-core A4 chip)
  • 512 MB RAM
  • 3.5″ Retina display (640×960 resolution with 800:1 contrast ratio and500 cd/m2 max brightness)
  • Fingerprint-resistant oleophobic coating
  • New antenna design which automatically switch between two antennas to provide the best signal.
  • 8MP rear-facing camera (upgraded from 5MP)
  • 1080p full HD video recording at 30 fps (upgraded from 720p HD video recording)
  • f/2.4 aperture (upgraded from f/2.8)
  • Video stabilization via built-in gyroscope
  • World phone and can work on UMTS/HSDPA/HSUPA (850, 900, 1900, 2100 MHz), GSM/EDGE (850, 900, 1800, 1900 MHz) and CDMA EV-DO Rev. A (800, 1900 MHz) networks
  • Intelligent Siri voice command personal assistant
  • iOS features
  • iCloud features
  • Talk time: Up to 8 hours on 3G, up to 14 hours on 2G (GSM); Standby time: Up to 200 hours; Internet use: Up to 6 hours on 3G, up to 9 hours on Wi-Fi; Video playback: Up to 10 hours; Audio playback: Up to 40 hours
  • Height: 4.5 inches (115.2 mm); Width: 2.31 inches (58.6 mm); Depth: 0.37 inch (9.3 mm); Weight: 4.9 ounces (140 grams)
  • 802.11b/g/n Wi-Fi (802.11n 2.4GHz only) and Bluetooth 4.0 wireless technology
  • Three-axis gyro; Accelerometer; Proximity sensor; Ambient light sensor
Price of iPhone 4S (with two-year wireless service contract with AT&T, Verizon or Sprint):
  • 16GB (Black or White): $199
  • 32GB (Black or White): $299
  • 64GB (Black or White): $399
Price of unlocked and contract free iPhone 4S:
  • 16GB (Black or White): $649
  • 32GB (Black or White): $749
  • 64GB (Black or White): $849
The iPhone 4S will available in store from October 14 on the above countries, plus Japan. The shipment for pre-order will start around October 14 too.
Shop for iPhone 4S on Apple Store Online (US) or Apple store of respective countries.

Difference between iPhone 4S and iPhone 4

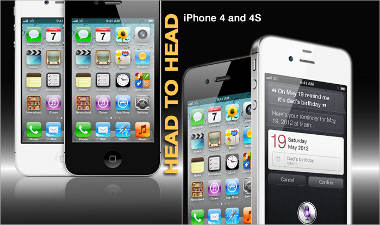
In terms of design, iPhone 4 and iPhone 4S look identical as both have glass sandwich design. The letter S in the name iPhone 4S probably stands for improved speeds, but the storage now goes way too high, up to 64 GB.

 Apple has finally come out with its latest device - the iPhone 4S. The device, in contrary to the earlier reports, does not have an astonishingly thin body not the revolutionary NFC chip. Of course, the users get better camera, a new processor and better than ever download speeds. The new features are definitely good, but nothing compared to what the users are expecting in the device.
When the iPhone 4S and iPhone 4 are compared head to head, the iPhone 4S goes ahead with its Siri voice-activated personal assistant, A5 processor, CMDA+GSM chip, 1080p video capability, faster download speeds, improved graphics, improved camera and an intelligent switching antenna. The iPhone 4S also has a new operating system - iOS 5, as well, but that will be available for older iPhones as well.
In terms of design, iPhone 4 and iPhone 4S look identical as both have Glass Sandwich design. The letter S in the name iPhone 4S probably stands for improved 'speed'. The storage has also gone too high, up to 64 GB. The iPhone 4 storage went up to 32 GB only. The image quality is expected to be better even in low light conditions, the video resolution would also be better.
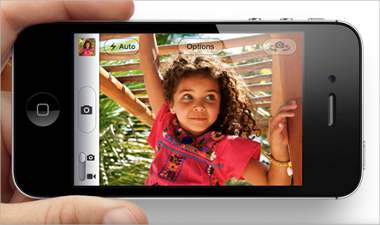
The iPhone 4S comes with an 8 megapixel camera compared to the 5 megapixel of iPhone 4. In terms of pixels, the front facing camera goes from 720 pixels to 1080 pixels though it still remains a 0.3 MP one. The iPhone 4S also has hybrid GSM/ CDMA cellular connectivity whereas the iPhone 4 had quad-band GSM/ CDMA cellular connectivity.
Simply stated, the iPhone 4S owners will find it easier to roam between countries which are predominantly GSM network country and those places where CDMA networks are prevalent. The faster A5 dual core processor will make it powerful device, with a claimed battery life of 8 hours. Last, but not the least is the Siri personal assistant which may prove to be quite an attraction for the users. The screen size in both the phones is 3.5 inches with 640x960 retina display.
About the RAM, a website has claimed it would be 1 GB for iPhone 4S but we didn't find supporting evidence on the Apple website. The iPhone 4 has a RAM of 512 MB only.

iPhone 4S coming to India on Nov 25th

Aircel has confirmed the date to The Mobile Indian today and Airtel is also likely to launch the smartphone on the same date.

 Apple iPhone 4S is set to come to India on 25th of this month. Both Airtel and Aircel have earlier confirmed bringing the latest iPhone couple of days back.

"We are likely to launch iPhone 4S in India on November 25. Tariff plans will be announced later," Aircel spokesperson told The Mobile Indian.
Both the operators are likely to offer attractive money back tariff plans for the iPhone buyers. Both the operators are currently offering iPhone 3GS and iPhone 4 with up to 100 per cent money back offers through discounted tariff plans.
Difference between iPhone 4 and iPhone 4S.
The iPhone 4S comes with the new Siri voice-activated personal assistant, A5 processor, CMDA+GSMchip, 1080p video capability, faster download speeds, improved graphics, improved camera and an intelligent switching antenna. The iPhone 4S also has a new operating system - iOS 5, as well but that will be available for older iPhones as well.
In terms of design, iPhone 4 and iPhone 4S look identical as both have Glass Sandwich design. The letter S in the name iPhone 4S probably stands for improved 'speed'. The storage has also gone too high, up to 64 GB. The iPhone 4 storage went up to 32 GB only. The image quality is expected to be better even in low light conditions, the video resolution would also be better.
The iPhone 4S comes with an 8 megapixel camera compared to the 5 megapixel of iPhone 4. In terms of pixels, the front facing camera goes from 720 pixels to 1080 pixels though it still remains a 0.3 MP one. The iPhone 4S also has hybrid GSM/ CDMA cellular connectivity whereas the iPhone 4 had quad-band GSM/CDMA cellular connectivity.

Tuesday, November 08, 2011

New Passport Issue Centers in Andhra Pradesh at Hyderabad, Vizag, Vijayawada – Apply Online

You need to run to all the way from Tirupati to Hyderabad to get a passport thanks to the central government’s decision to open more passport issue centers in Andhra Pradesh. The Govt .of India has announced 7 more Pass Port Issue Centers to the state of Andhra Pradesh. The new centers will come up at Hyderabad, Vijayawada, Nizamabad, Tirupati, Visakhapatnam and Karimnagar (mini passport service center). At present, AP has only one center in Hyderabad making it difficult for other regions to get a passport. Following is the list of new passport issue centers in Andhra Pradesh and online application / Online Registration procedure:
1) Hyderabad: 3 Centers
2) Vijayawada: 1 center
3) Nizamabad : 1 center
4) Tirupathi: 1 center
5) Vizag: 1 center
6) Karimnagar: 1 Mini Service Center
Apart from these, the Govt. of India has also sanctioned a mini passport issue center at Karimnagar. Ministry of External Affairs has issued orders in this respect. This will enable the authorities for quick process and reduce delay in issuing passports. Applications received online were kept pending for months at present in Hyderabad and it also became a big financial activity for mediators.
People can register / apply online for passports throuhg official website of Regional Passport Office www.ap.nic.in/passport/ . OR you can download the application forms from the website and submit in the passport issue center. Detailed application procedure, check list of certificates and documents required and fee info are also available on the website.

Mee Seva Centers in Andhra Pradesh for Revenue and Registration Certificates

Yet another scheme is on the cards in Andhra Pradesh. Named as ‘Mee Seva’ (In your service), the scheme will be implemented from 4th November 2011. The Mee Seva Scheme will be initially rolled out in Krishna and Chittoor districts. The scheme is intended to issue certificates related to Revenue and Registration departments from a single window Mee Seva Centers. About 12 types of certificates will be issued through Mee Seva Scheme.
The Government is contemplating to extend the scheme to other districts by 31st march 2012. All the official certificates will be made available through these centers. Krishna district has already geared up with Mee Seva centres and cancelled permissions to the existing e-seva, AP online and common service centres, which are involved in this work. Mee Seva Centers are expected to provide more transparency in the services offered by the government. Ministry of Information Technology, Govt. of AP is taking care of technical aspects of the scheme.
The pilot project of Mee Seva is being launched in Krishna and the Chittoor districts. At present all the government services were being provided through the 107 AP online centers, 22 e seva centers and 34 common service centers. The Tahsildars are directed to mould the existing service centres in their respective areas. Only government services will be provided in the Mee Seva centers. As per the Mee Seva norms of the Government, all the services of e-Seva, AP online and Common Services will be converted as Mee-Seva centres.

Monday, November 07, 2011

InputDirector: Control Multiple Windows Systems with Single Keyboard and Mouse

A Software to easily swich between two physical computer consoles
As part of one of my project, I have to work on two physical systems. So, I don’t have any option than connecting both of them at my desk maintain two keyboards and mouses. When ever I want to switch between computers, I have to swing my chair to reach other keyboard and mouse. This is really painful and I have to switch like this for more than 100 times a day. Initially I thought of of using a KVM. But I am afraid after looking at it’s cost. That too, I have multi monitors connected for one of my system, that means I have three monitors now. If I use a KVM, I can not make use of multi monitor.

That time, I dreamed about a application which easily takes your mouse control from monitor of one machine to monitor of other machine, when it reaches end of first one. My friends said, it is out of scope. I too felt that and days are rolling….and I have no option than to swing my chair every time.
But today I have seen something great which really helped me. I was reading Technet Magazine and in IT tool box section, they talked about Input Redirector. After reading it’s overview, I felt very happy and immediately tried on my machine.  It worked like a champ and I am able to change my KB and mouse control to second machine with just a mouse move. Amazing right?. I read completely about this tool and they have some more exciting features like, clipboard transfer between computers, Simultaneously locking all computers, and has hotkey option for faster switching between computers …many more…

Visit Product Site, if you want to give a try.

Recover Active Directory objects using PowerShell

I am an avid fan of quest products when it comes to Active Directory restoration. Their products make you to restore objects in active directory without taking the domain controller offline to DSRM mode. There are many products available in market but it is efficient than other in my opinions. The purpose of writing this post is not give publicity for Quest product but I want to take you through couple of videos from Quest which shows how seamless it is to restore objects from active directory. These videos are completely for Windows 2008 R2 where “Recycle bin” option feature is functional. Refer to Technet if you want to know more about “Recycle bin” optional feature in Active Directory 2008 and “Active Directory Recycle Bin Step-by-Step Guide”.
Recover single object using Quest AD Cmdlets:
Recover OU structure using Quest AD Cmdlets:
You can also do this with PowerPack from PowerGUI which is a cost effective solution compared to Quest products. This PowerPack helps you to recover deleted objects from Active Directory recycle bin only but not the items which enterd tombstone — that means it is out of recyclebin. 


What is GPP(Group Policy Preferences)

GPP is a new technology introduced with Windows Server 2008 to make life of administrators much easy. There are variety no. of settings available in GPPs which helps you manage your system effectively. 
Using GPPs you can administer the following components of Operating System. You can manage both these user-based and computer based settings from GPPs. The below list shows the settings available in GPPs. A setting can be applied to either a computer or a user or to both based the setting.
  • Applications (User-based)
  • Drive Mapping (User-based)
  • Environment Variables (User-based and computer-based)
  • Files (User-based and computer-based)
  • Folders (User-based and computer-based)
  • Ini Files (User-based and computer-based)
  • Registry (User-based and computer-based)
  • Shortcuts (User-based and computer-based)
  • Network Shares (Computer-Based)
  • DataSources (User-based and computer-based)
  • Devices (User-based and computer-based)
  • Folder Options (User-based and computer-based)
  • Internet Settings (User-Based)
  • Local Users and Groups (User-based and computer-based)
  • Network Options (User-based and computer-based)
  • Power Options (User-based and computer-based)
  • Printers (User-based and computer-based)
  • Regional Options (User-based)
  • Scheduled Tasks (User-based and computer-based)
  • Start Menu (User-Based)
  • Services (Computer-Based)
If no targets are applied, all the computer/users under this policy will get these settings. If you want to restrict this policy to specific users/computers  inside OU, then you need to use targeting. There are 25 targeting options are available which can be used alone or in conjunction with other items. Some of the interesting targets are battery present, computer name, disk space, IP address range, LDAP query, OU, Regkey match, security group, site name, user name and wmi query.
Some of the uses of GPPs are…
  • You can restrict the desktops local administrators group membership. If any one adds their account to local admins, that will be taken off during the next GPO processing due to GPP setting.
  • You can execute scripts, commands in user context at scheduled times.
  • Control power options on laptops/desktops
  • Easily deploy files to desktops based on user and computer
  • Push short cuts to user/desktops
  • And GPPs can definitely replace some of the settings which are being handled by your computer/user login scripts now. Using GPPs for these settings considerably less time than using scripts.
Compatibility…
I am sure many of the users will look for this information after going through the GPP exciting features. Though this feature released with Windows 2008 server, you can happily use GPPs in your existing Windows Server 2003 domain which has XP clients. The only thing you need to do is deploy GPP Client side extensions package from Microsoft. The latest buddies like Windows Vista, Windows 7, and Windows 2008 server will come this CSE by default.
You can read more details about this from below sources…

How to Dual-Boot Windows 7 and Windows 8 Side By Side


The Windows 8 developer preview is out for all to try, but installing it over your main Windows setup is a scary (and unrealistic) prospect. Here's how to dual boot Windows 8 with your current Windows 7 installation so you can run them both side by side.
If you've ever dual booted a machine before, this shouldn't seem too foreign. All you need to do is create a new partition for Windows 8, install it on that partition, and then edit your new boot menu so Windows 7 stays the default OS. Here's how to do it.

Step One: Create a New Partition

Before you start, make a backup of your data—you're going to be formatting drives and installing OSes, so anything could go wrong, and you don't want to lose your whole system. When you're ready, we'll need to create some space for Windows 8 on your hard drive. Assuming you have at least 20GB of space free on your drive, you're going to use Windows' Disk Management to set partition those 20GB for Windows 8. Open the Start Menu and right click on the "Computer" option. Click "Manage", and in the window that appears, click on "Disk Management" in the left sidebar. Find your system hard disk in the graphical list that appears in the bottom pane. Right-click on it and then click "Shrink Volume". Shrink it down so you have at least 20GB of space left on the end of the drive, and click OK. Then, click on the "Unallocated" block of that drive that appears and click "New Simple Volume". Click Next on the next few windows until you get to the "Format Partition" window. Here, give it a volume label you'll recognize (like "Windows 8") and click Next. It should format the drive for you. Now you're all set to install Windows 8.

Step Two: Install Windows 8

If you haven't downloaded the Developer Preview ISO yet, head over to the Windows Developer Center and download it. Burn it onto a DVD using something like ImgBurn, or burn it to a thumb drive if you don't have a DVD drive in your machine. Make sure your computer is set to boot from CD or USB, stick in your installation media, and reboot.
How to Dual-Boot Windows 7 and Windows 8 Side By SideIf you get a prompt to "Press any key to boot from DVD", then hit a key on your keyboard. You should boot right into the Windows 8 installer. It actually looks almost exactly like the Windows 7 installer, so it should seem a little familiar. Just pick your language, hit "Install Now", and choose "Custom" when asked what type of install you'd like to perform.
On the next screen, find your new partition on the list of drives. Make sure it's the right one, because you're about to write over whatever's on it. Hit "Next" and let the installer do its thing. When you're done, your computer should reboot into Windows 8. It'll probably reboot one more time after it does, then you'll be greeted with the Windows 8 Start screen. If you choose to enter a Windows Live ID here, make sure you have access to your email and can confirm your computer—otherwise it might not let you boot into it.

Step Three: Make Windows 7 the Default (Optional)

How to Dual-Boot Windows 7 and Windows 8 Side By SideYou'll notice when you first boot up into Windows 8 that you're presented with a new graphical boot menu that'll let you choose between your Windows 7 and Windows 8 installations. Windows 8 will be the default, meaning if you don't manually choose Windows 7 from the menu, your computer will boot into Windows 8 after three seconds of inactivity. Chances are, you don't want to make Windows 8 the default quite yet, so here's how to make Windows 7 the default.
On the boot menu, click on the button at the bottom that says "Change Defaults or Choose Other Options", and hit "Choose the Default Operating System". From there, you can pick Windows 7 from the menu. From now on, your computer will boot into Windows 7 by default, but if you feel like playing around with Windows 8 that day, you can just pick it from the boot menu. Enjoy playing with the developer preview, and let us know what you think in the comments.